
 |
| Not long ago I was lucky to get this beautiful Yost No. 11. First action was to fix the drawing cord, which kept me busy for one hour. Once done, the carriage moved as needed. The type-slugs of this 1910+ typewriter rest on an ink-imbued felt ring. The latter had dried out over the decades (it might well be one century). So I tried to fix this. |
 |
| Still not at its best, but a nice result for this Yost 11 with replaced and self-inked pad. Here is for details: |
 |
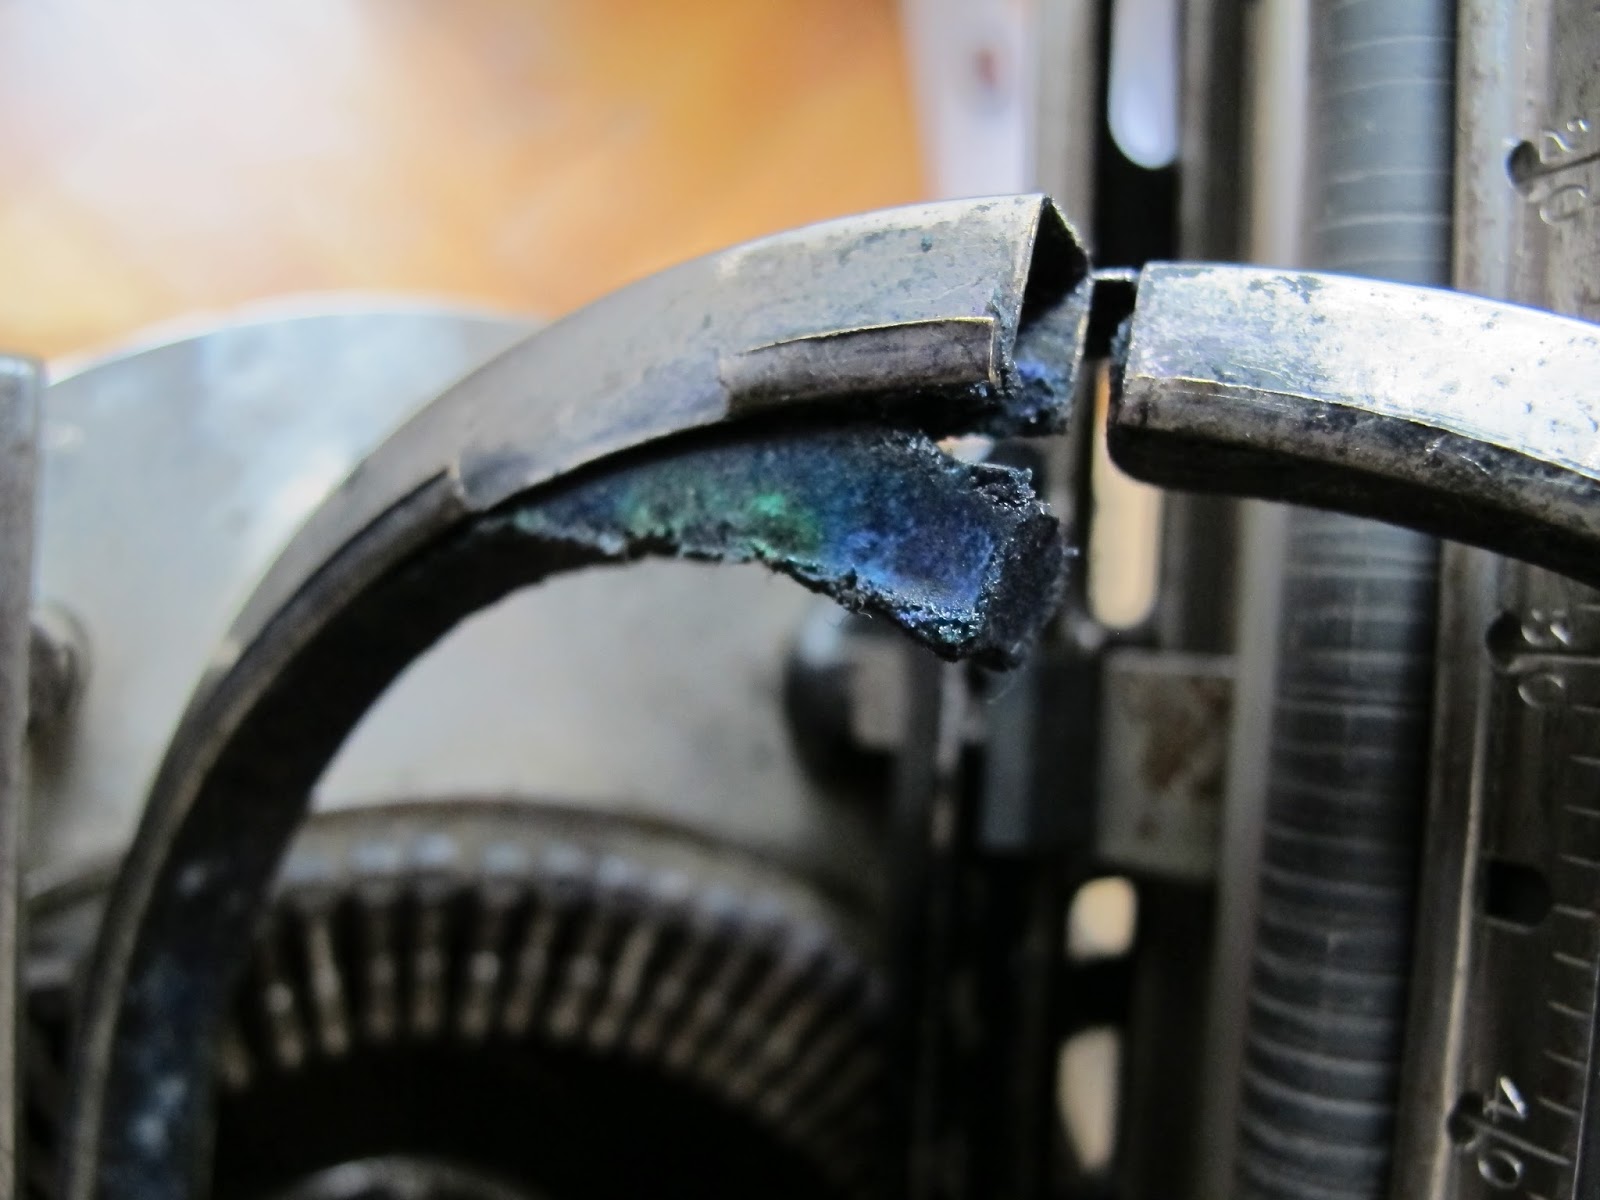
| The original inkpad |

 |
| pretty hard, 100 year old felt |

 |
| the new material, pressed felt. i was lucky to get a piece with the perfectly fitting diametre. |
 |
| original colour: blue |
 |
| The old felt-ring came off fine, scraping the remains with a screwdriver to finish the job. |


 |
| fitting the new felt pad |

 |
| I applied this several times over, and let it soak in over night. This is special ink used for colouring metal. The other base type of ink is for use with rubber types. |
 |
| putting back the ring with the new ink-pad was somewhat tricky. i managed by fixating the typebars with a cord, pulling them towards the middle. after which i could fit the ring back without problems. |
 |
| I can't believe I own this cool machine! |
 |
| Thanks for watching, and Happy Typing! |
Good job!! This ink seems to work pretty well. I've never tried doing this myself.
ResponderBorrarThe original formulation is near magical. I have actually seen a few Williams and Yost machines, in the 21st century, type visibly using their old inkpads. Then the ink dries immediately on the paper, after having survived in the felt for perhaps 100 years. Of course, storage conditions have to be just right for this to happen.
Gut gemacht!
ResponderBorrarGreat job! I have never seen a Yost type let alone having the ink pad replaced.
ResponderBorrarThank you Georg!
ResponderBorrar